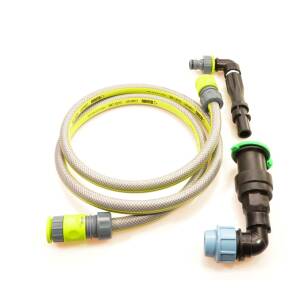

Placing water outlets decentrally in the garden - easier than using a tap
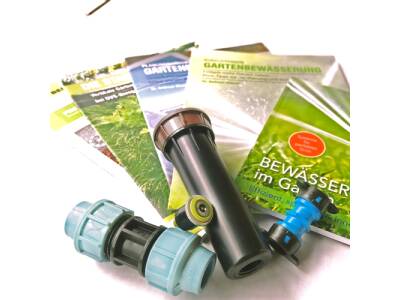
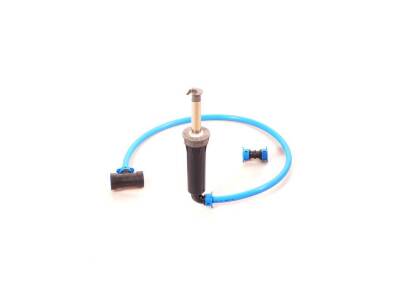
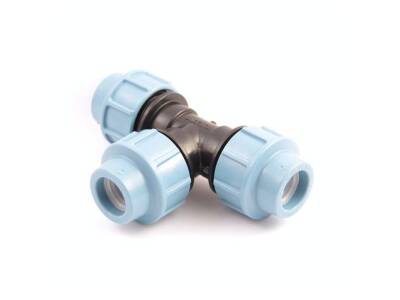
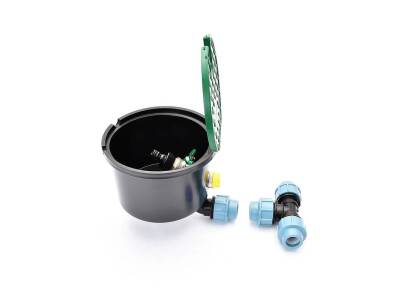
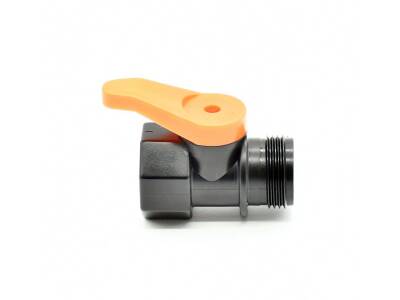
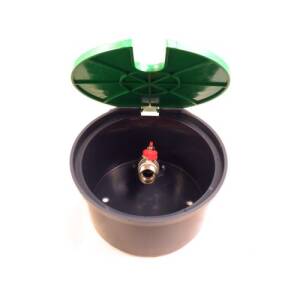
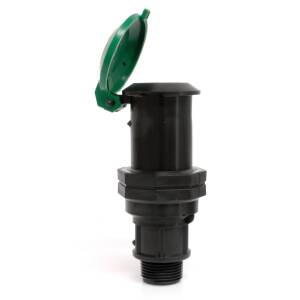
A water socket is more inconspicuous and easier to install than a water tap. A great advantage is the low cost and the flush-floor installation. This makes the water socket ideal for providing water outlets anywhere in the garden. A water socket usually has a female thread of 3/4" or 1". A pressure fitting with a male thread is used to connect the water socket to the PE line / Pipeline.
Water sockets at DVS Beregnung - water at any chosen point
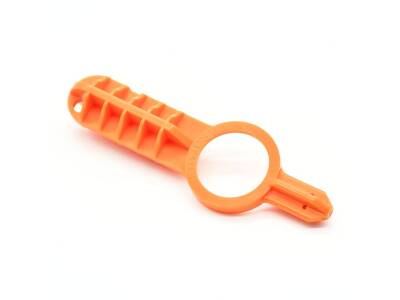
If you want to purchase a water socket, you will find everything you need to know about water sockets on our website. We explain what types of water sockets there are and what you should consider when installing them. A water socket is usually made of plastic. However, there are also models made of metal. A lid ensures that no soiling, such as grass and leaves, gets into the ball valve when the water socket is not in use. To connect the water pipe, simply open the lid.
Installing a water socket - what do I need to consider?
A water socket is a practical device that allows you to get water to the most remote corners of your garden. It is fitted into the permanent pressure pipe and can simply be connected to a hose if required. The advantage of a water socket is that the water is always available at these points and can be used as needed.
Water supply and permanent pressure - using the water outlet properly
To make water withdrawal as easy as possible, it is best if the water socket is installed in the area of permanent pressure. The connection should therefore be made before the valve box. Depending on the water source, the socket is then permanently under pressure and water can be withdrawn via the garden hose without activating the control unit and the valves. There is no need to go to the control unit as the water flow starts directly.
Winterising water sockets - draining the socket just like the entire irrigation system
Just like the garden irrigation system, a water socket must be drained before the first frost so that the pipes and the socket don't get damaged by frost. For that purpose, we recommend drainage by compressed air and compressor.
Water sockets from Irritec, Rain Bird and Rain SPA
Order your water socket now at the best value for money on the DVS Beregnung website. Simply add the item to your shopping basket.
We are offering fair shipping costs and help our customers with their planning. The delivery of your purchase is made by DHL directly to your home.
"What Homeowners Should Know About the Installation of a Garden Water Socket"
Introduction: Overview of Garden Water Sockets
- Summary: This section introduces the concept of garden water sockets (also known as valve hydrant boxes or hydrant valve boxes), explaining their importance in a home garden irrigation system. It positions the garden water socket as a crucial component for efficient water management and accessibility in gardens.
Section 1: Planning Your Garden Water Socket Installation
-
Subsection 1.1: Choosing the Right Location
- Summary: Discusses factors that influence the choice of location for a garden water socket, including proximity to water supply lines and areas requiring frequent watering.
-
Subsection 1.2: Understanding Water Pressure and Flow Requirements
- Summary: Explains how to assess water pressure and flow, crucial for determining the type of socket needed for optimal irrigation.
Section 2: Essential Tools and Materials for Installation
-
Subsection 2.1: List of Necessary Tools
- Summary: Provides a detailed list of tools required for the installation of a garden water socket, ensuring readers are well-prepared before beginning the installation process.
-
Subsection 2.2: Selecting Quality Materials
- Summary: Emphasizes the importance of choosing high-quality materials like those from brands such as Hunter and Rain Bird for durability and long-term performance.
Section 3: Step-by-Step Guide to Easy Garden Water Outlet Installation
-
Subsection 3.1: Preparation Steps
- Summary: Covers the initial steps such as marking the area, preparing the trench, and ensuring all necessary materials are at hand.
-
Subsection 3.2: Installation Process
- Summary: Offers a detailed, step-by-step guide on how to physically install the garden water socket, incorporating SEO phrases like "easy garden water outlet installation" and "garden water socket installation."
Section 4: Common Mistakes to Avoid During Installation
-
Subsection 4.1: Overlooking Local Regulations
- Summary: Highlights the importance of adhering to local building codes and regulations during installation.
-
Subsection 4.2: Inadequate Sealing and Support
- Summary: Describes common errors such as poor sealing of connections and insufficient support for the installed sockets, with tips on how to avoid these pitfalls.
Section 5: Troubleshooting Common Issues with Garden Water Sockets
-
Subsection 5.1: Dealing with Leaks
- Summary: Provides practical advice for identifying and fixing leaks, which are a common issue after installation.
-
Subsection 5.2: Managing Low Water Pressure
- Summary: Offers solutions for resolving issues related to low water pressure, ensuring optimal operation of the garden water socket.
Conclusion: Maximizing the Benefits of Your Garden Water Socket
- Summary: Summarizes the key points discussed, encourages proper maintenance, and reiterates the value of integrating technologies like WiFi-connected controllers for remote management of the irrigation system.
This article is written to guide homeowners through every aspect of choosing, installing, and maintaining a garden water socket, with a focus on practical advice and common pitfalls to avoid.
Introduction: Overview of Garden Water Sockets
Garden water sockets, often referred to as valve hydrant boxes or hydrant valve boxes, serve as pivotal components in the architecture of home garden irrigation systems. Their utility extends beyond simple water access; they embody a crucial nexus point that facilitates efficient water management and strategically enhances the functionality of any garden's irrigation setup.
Traditionally, discussions around garden irrigation focus primarily on sprinkler systems and drip lines, but the role of garden water sockets is both fundamental and frequently underappreciated. These installations offer homeowners not only convenience but also control over water distribution directly from their garden's layout. The strategic placement of a garden water socket can dramatically reduce the effort required to manage watering chores, especially in larger or more complex garden designs.
Moreover, in the context of environmental sustainability—a topic that is gaining increasing relevance and urgency—garden water sockets can play a key role. By enabling precise control and placement of water distribution points, these devices minimize wastage and ensure that water is used judiciously. When coupled with advanced technology, such as WiFi-connected controllers, garden water sockets allow for remote management of water usage. This feature is particularly valuable for busy homeowners or those who travel frequently, as it ensures that gardens remain nourished without excessive water use, thereby promoting resource conservation.
Another seldom-discussed advantage of incorporating a garden water socket into your irrigation plan is its potential to enhance the aesthetic value of your outdoor space. Hidden or discreetly integrated sockets maintain the visual integrity of your garden while providing all the functional benefits. This aspect is crucial for homeowners who cherish the visual appeal of their garden as much as its utility.
In sum, understanding the strategic importance of garden water sockets is essential for anyone planning a robust and efficient garden irrigation system. As we delve deeper into the nuances of installation and maintenance, it becomes clear that these fixtures are not just peripheral additions but are central to the creation of a sustainable, convenient, and visually pleasing garden Environment.
1.1: Choosing the Right Location
Selecting the optimal location for a garden water socket, or valve hydrant box, is more than a mere logistical decision—it's a strategic move that influences the effectiveness, efficiency, and sustainability of your garden's irrigation system. The right placement can save significant resources, enhance garden health, and reduce maintenance issues. This section delves into the often-overlooked factors that should guide your decision-making process when choosing the location for your garden water socket.
Understanding Your Garden’s Microclimate
Before deciding where to install a garden water socket, it is crucial to understand your garden's microclimate. Different areas of your garden may receive varying amounts of sunlight, wind, and rain, affecting soil moisture levels and the specific water needs of plants in those areas. Positioning a water socket in a location that aligns with these microclimate conditions can lead to more targeted watering, reducing water waste and promoting healthier plant growth.
Soil Composition and Permeability
Soil type can significantly impact where a garden water socket should be placed. For instance, clay-heavy soils retain moisture longer than sandy soils, which drain quickly. Installing a water socket in an area with appropriate soil type ensures that water distribution is neither excessive, leading to waterlogging, nor insufficient, risking dry conditions. Consider conducting a soil test to understand your garden’s soil composition better; this information can guide not only the location but also the frequency and intensity of irrigation provided.
Proximity to Main Water Lines
The proximity of the installation site to main water lines is another critical factor. While it might seem convenient to place a garden water socket in a remote part of the garden, the farther it is from the main water line, the more likely you are to encounter issues with water pressure and flow, which can complicate installation and functionality. Analyzing the layout of existing plumbing can provide insights into the most accessible points for connecting new irrigation components, thus minimizing extensive excavation work and reducing costs.
Accessibility for Maintenance and Usage
Ease of access is paramount for both regular use and maintenance. A water socket should be conveniently located to enable easy access for gardening tasks, yet it should not interfere with daily activities or disrupt the aesthetic flow of the garden. Additionally, consider the winter months or any other off-season periods—accessibility for winterizing or performing maintenance when plants are dormant is crucial to ensure longevity and performance of the irrigation system.
Integration with Garden Design
The aesthetic integration of a garden water socket should not be underestimated. Thoughtful placement can enhance a garden's design rather than detract from it. Consider hidden yet accessible areas where a hydrant box can be installed without being a visual distraction. Innovative solutions such as decorative covers or integration into garden features like benches or statues can also mask the functional nature of irrigation components while maintaining the garden's visual appeal.
Future Expansion Possibilities
Finally, consider the future growth and expansion of your garden. Installing a garden water socket with consideration for potential garden extensions or modifications can save significant time and expense later on. For example, if you plan to expand your garden or add new features like a pond or vegetable beds, ensure that the water socket is placed in a location that can easily serve these new additions.
Choosing the right location for your garden water socket is a nuanced decision that impacts not just the irrigation efficiency but also the overall health and design of your garden. By considering these factors, you are not only optimizing your current garden setup but are also paving the way for a more adaptable and sustainable garden Environment.
1.2: Understanding Water Pressure and Flow Requirements
Ensuring that your garden's irrigation system is equipped with the right water pressure and flow is critical for its effectiveness and efficiency. This section explores some sophisticated aspects of assessing water pressure and flow, which are often overlooked but are essential for the long-term success and sustainability of garden irrigation systems.
Key Concepts of Water Pressure and Flow
Water Pressure Basics:
- Water pressure, measured in pounds per square inch (PSI), determines how forcefully water is pushed through your irrigation system.
- Ideal water pressure is necessary for ensuring that water is distributed evenly across your garden without causing damage to plants or erosion in the soil.
Understanding Flow Rate:
- Flow rate, measured in gallons per minute (GPM), indicates the volume of water that passes through your irrigation system within a minute.
- Knowing the flow rate is crucial for designing a system that can handle the water needs of your garden without overloading or underutilizing any part of the system.
Factors Affecting Water Pressure and Flow
Elevation Changes Within Your Garden:
- Water pressure decreases with an increase in elevation. Gardens on a slope may require different water sockets with varied pressure specifications to ensure uniform water distribution.
Length and Diameter of the Piping:
- Longer pipes reduce water pressure due to friction loss as water travels through them.
- Using the correct pipe diameter can help maintain optimal flow rate and pressure. Smaller diameters are generally sufficient for shorter distances, but larger diameters might be necessary for extensive garden layouts.
Type and Number of Irrigation Zones:
- Segmenting your garden into irrigation zones based on similar watering needs can optimize water use and pressure management.
- Each zone should be designed considering the cumulative flow rate needed and the pressure required to operate efficiently.
Calculating Your Garden’s Water Pressure and Flow Needs
How to Measure Water Pressure:
- Use a pressure gauge attached to a faucet closest to your main water supply line to get an accurate reading of your static water pressure.
Determining Flow Rate:
- You can determine the flow rate by timing how long it takes to fill a known volume container from your garden tap. This practical test gives you a baseline for designing your irrigation system.
Professional Assessment:
- Consider hiring a professional to conduct a comprehensive assessment. This can provide a detailed understanding of your garden’s unique characteristics and help tailor the irrigation system to its specific needs.
Adjusting Water Pressure and Flow
Pressure Regulators:
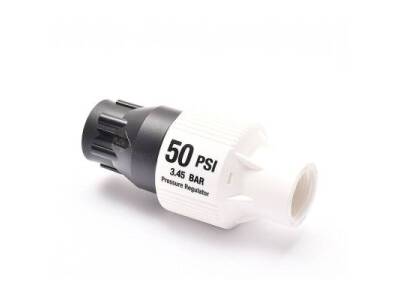
- Installing pressure regulators can help manage excessive water pressure that could otherwise damage plants and erode soil.
Using the Right Sprinkler Heads:
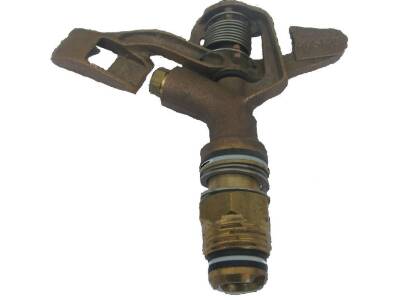
- Select sprinkler heads that are designed to operate within your garden's water pressure range. Different heads have varying requirements and efficiencies.
Regular Maintenance Checks:
- Periodic checks for leaks, blockages, and wear can prevent changes in water pressure and flow, ensuring the system remains efficient over time.
Understanding and managing water pressure and flow in your garden's irrigation system is not just about maintaining the health of your plants—it's about optimizing water use and ensuring sustainability. These technical aspects, when properly addressed, can significantly impact the effectiveness of your irrigation efforts, making your garden not only a place of beauty but also a model of environmental responsibility.
2.1: List of Necessary Tools
When preparing for the installation of a garden water socket, having the right tools at your disposal can streamline the process, ensure safety, and result in a more durable and effective irrigation system. This section outlines the essential tools required for installing a garden water socket, with special attention to tools that are often overlooked but can significantly enhance the installation experience and outcome.
Essential Tools for Garden Water Socket Installation
Trenching Tools:
- Shovels and Spades: Necessary for digging trenches where pipes will be laid. A sharp, sturdy spade is invaluable for cutting through sod and tougher soil.
- Trenching Hoe: A less commonly used but highly effective tool for clearing narrow trenches. Its design allows for more targeted digging with less effort.
Pipe Cutters and Saws:
- Pipe Cutters: Essential for cleanly cutting through irrigation pipes, ensuring a snug and secure fit when connecting joints and valves. They provide a much cleaner cut than saws, which is crucial for preventing leaks.
- Hacksaw: Useful for cutting through thicker or more rigid materials that a standard pipe cutter can't handle.
Measuring and Leveling Tools:
- Tape Measure: Precision is key in installation, and a reliable tape measure is necessary for accurate placement of pipes and sockets.
- Level: Ensures that all components are installed at the correct angles to facilitate proper water flow and prevent pooling or uneven distribution.
Plumbing Tools:
- Plumber’s Tape: Often overlooked, plumber's tape is crucial for creating water-tight seals at threaded joint connections, which helps prevent leaks.
- Wrenches and Pliers: Adjustable wrenches and locking pliers are needed for tightening and securing fittings and components.
Soldering and Sealing Equipment:
- Soldering Kit: For metal pipes and components, a soldering kit may be necessary to ensure secure, leak-proof joints.
- PVC Cement or Pipe Sealant: For PVC and plastic pipes, appropriate adhesives are critical for securing joints, especially under varying temperature and pressure conditions.
Specialized Tools for Enhanced Installation
Soil Moisture Probe:
- While not typically included in basic toolkits, a soil moisture probe can be extremely helpful before installation to determine the most effective locations for water sockets based on soil moisture levels.
Laser Distance Measurer:
- For larger gardens, a laser distance measurer can provide more accurate readings than a standard tape measure, which is beneficial for planning out extensive piping networks.
Inspection Camera:
- A flexible inspection camera can be invaluable for checking underground pipe alignments and spotting obstructions or damages that need to be addressed without extensive excavation.
Safety Gear
Protective Clothing:
- Safety gloves to protect hands while digging and handling rough materials.
- Goggles to shield eyes from dirt, debris, and flying particles during cutting and soldering.
- Ear protection if using loud power tools.
First Aid Kit:
- Always have a basic first aid kit on hand in case of minor accidents and injuries.
Having the right tools is not just about facilitating the installation process—it's about doing the job right the first time, ensuring the longevity and reliability of your irrigation system. By equipping yourself with these essential and specialized tools, you can approach the installation of your garden water socket with confidence, knowing that you have everything needed to achieve a professional-quality result.
2.2: Selecting Quality Materials
For any irrigation project, the selection of high-quality materials is not just about ensuring the longevity and effectiveness of the system—it's also about minimizing maintenance, optimizing water usage, and ensuring sustainability. This section delves into the importance of choosing the best materials for your garden water socket installation, highlighting considerations that are often overlooked in standard guides.
Criteria for Selecting Irrigation Materials
Durability Under Local Conditions:
- Materials should be chosen based on their ability to withstand the specific environmental conditions of your area. UV resistance, frost resistance, and the ability to endure the chemical properties of your soil and water are critical factors to consider.
Compatibility with Existing Systems:
- If you are integrating new components into an existing system, ensuring material compatibility is essential to avoid leaks, pressure issues, or chemical reactions that could degrade components.
Recommended Materials for Pipes and Fittings
PVC Pipes:
- Advantages: PVC is lightweight, resistant to corrosion and chemicals, and generally less expensive than metal piping. It’s also easier to cut and fit together, making it ideal for DIY projects.
- Considerations: Ensure that the PVC is rated for outdoor use and sufficient pressure levels.
Polyethylene Pipes:
- Advantages: Extremely flexible and often used for sub-surface irrigation systems where rigid piping is impractical. Its flexibility makes it resistant to cracking under pressure and temperature changes.
- Considerations: Connections may require specific fittings and clamps, which should be accounted for in your planning.
Copper Pipes:
- Advantages: Extremely durable and reliable with a long lifespan. Copper is also naturally resistant to bacterial growth.
- Considerations: Higher cost compared to plastics and may require soldering skills for installation.
Quality Fittings and Connectors
Brass Fittings:
- Advantages: Offers excellent durability and corrosion resistance. Ideal for permanent installations where reliability is critical.
- Considerations: Can be more expensive, but the cost reflects the quality and longevity.
Stainless Steel Clamps:
- Advantages: Necessary for securing connections, especially in high-pressure systems, and resistant to rust and corrosion.
- Considerations: Ensure that the size and type match the pipes and hoses they are intended to secure.
Importance of Filter Systems
-
Screen and Disc Filters:
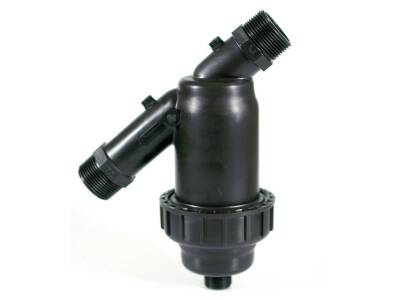
- Incorporating a good filtration system can prevent clogging and damage to the irrigation components. Filters are essential for removing debris from the water, which is particularly important if you use well water or have older plumbing that might disperse sediment.
Sealing and Bonding Agents
Thread Seal Tape:
- Essential for creating waterproof joints, especially in threaded pipe connections. This inexpensive material can prevent many potential leaks.
Silicone Sealants:
- For outdoor installations, silicone-based sealants offer excellent waterproofing and flexibility, suitable for materials that expand and contract with temperature changes.
Epoxy Adhesives:
- For more permanent bonds, especially in high-stress areas, epoxy provides a strong seal that is resistant to chemicals and temperature fluctuations.
Selecting high-quality materials for the installation of a garden water socket goes beyond mere functionality. It's about crafting an irrigation system that is reliable, efficient, and sustainable, reducing the need for frequent repairs or adjustments and ensuring that your garden remains a thriving and vibrant space. By investing in the best materials upfront, you safeguard your garden’s future and optimize its potential for growth and beauty.
3.1: Preparation Steps
Proper preparation is the cornerstone of any successful DIY project, especially when it involves the installation of a garden water socket. This section outlines essential preparation steps that are often overlooked but are vital to ensure a smooth installation process and long-term success of your garden’s irrigation system.
Assessing Your Garden Layout
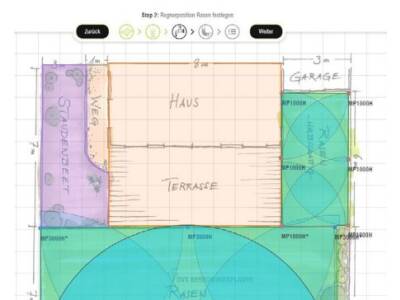
Map Your Garden: Before digging or making any changes, have a clear map of your garden. This includes noting existing irrigation lines, utility lines, and areas with specific watering needs. Use a garden planning tool, like DVS Irrigation Planner, to visualize and plan the layout efficiently.
Identify the Best Locations for Water Sockets: Based on the garden map, choose locations that are strategically beneficial for watering and maintaining the garden, ensuring they are accessible for future maintenance and adjustments.
Gathering Documentation and Permissions
Check Local Regulations: Many regions require homeowners to obtain permissions or follow specific guidelines before altering their landscapes or installing irrigation systems. Ensure all local building codes are adhered to prevent legal issues and potential fines.
Utility Locating Services: Before any excavation begins, it's crucial to contact local utility companies to mark out any underground services. This prevents accidental damage to utility lines, which can be costly and dangerous.
Organizing Tools and Materials
Prepare Your Tools: Gather all the necessary tools listed in section 2.1 and ensure they are in good working condition. This includes checking the sharpness of cutters, the calibration of measuring tools, and the functionality of digging equipment.
Purchase Quality Materials: Based on the recommendations in section 2.2, purchase all required materials ensuring they are of high quality and suitable for your specific garden conditions. Keep receipts and ensure return policies are understood in case exchanges are needed.
Setting Up the Work Area
Clear the Area: Remove any obstacles that might hinder the installation process. This includes trimming back plants, removing debris, and ensuring a clean and safe working environment.
Mark the Trench Lines: Using your garden map as a guide, mark out where trenches will be dug for the water lines. Use landscape marking paint or flags for clear visibility.
Safety Precautions
Personal Protective Equipment: Ensure you and anyone assisting wear appropriate protective gear. This includes gloves, goggles, and sturdy footwear to protect against sharp objects and machinery.
First Aid Kit: Always have a first aid kit nearby in case of minor accidents. It should include bandages, antiseptic wipes, and other basic first aid supplies.
Consider Environmental Factors
Weather Conditions: Check the weather forecast and plan your installation for a day with favorable weather conditions. Avoid rainy or extremely hot days, which can make the work more difficult and affect the curing of certain materials like cements and sealants.
Soil Wetness: Soil should be moist enough to dig easily but not so wet that it becomes muddy and unworkable. If the soil is too dry, watering the area lightly a day before can make the digging process easier.
Taking the time to thoroughly prepare for the installation of your garden water socket can significantly enhance the efficiency of the work and the performance of the installed system. Proper preparation not only prevents potential problems during the installation process but also ensures that the system will be easy to maintain and effective at conserving water in the long term.
3.2: Installation Process
Installing a garden water socket, also known as a valve hydrant box or hydrant valve box, is a task that, when done properly, can greatly enhance the efficiency and functionality of a garden's irrigation system. This section will guide you through a detailed, step-by-step installation process, integrating practical insights that are often overlooked but can significantly affect the outcome of your DIY project.
Step 1: Digging the Trench
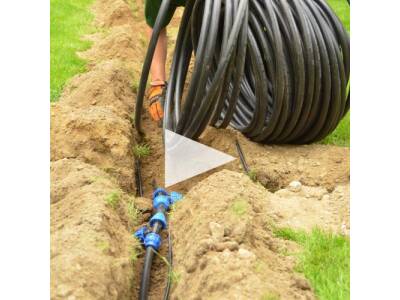
Prepare the Trench Path: Following the marks made during your preparation phase, begin digging a trench for the water lines. The depth and width of the trench should follow local guidelines and be sufficient to protect the pipes from weather conditions and accidental damage.
Use the Right Technique: Dig systematically, keeping the removed soil nearby and organized so it can be easily replaced. If using a trencher, make sure to operate it safely and according to the manufacturer’s instructions.
Step 2: Laying the Pipes
Measure and Cut Pipes: Measure the required length of pipes using the distances between your planned socket locations and water source. Cut the pipes cleanly using the appropriate tools to ensure they fit together without forcing, which could stress the pipes and lead to future failures.
Lay Pipes in the Trench: Place the pipes carefully in the trench. If your system uses PVC pipes, ensure all pieces align correctly without excessive bending. Secure connections with the appropriate fittings, using plumber's tape or adhesive as required for a watertight seal.
Step 3: Installing the Water Socket
Position the Socket: Place the garden water socket at your predetermined location. Ensure it is level with the ground or slightly above to prevent water from pooling around it and causing damage over time.
Connect to the Main Line: Connect the output from the main water line to the socket using the recommended fittings. Double-check all connections for tightness and proper alignment to ensure there are no leaks.
Step 4: Backfilling the Trench
Careful Backfilling: Begin backfilling the trench by replacing the soil in layers. Tamp down each layer gently but firmly to avoid leaving air pockets, which can lead to uneven settling and damage the pipes.
Water Settling: After partially backfilling, lightly water the soil to help it settle around the pipes. This step helps to remove further air gaps and secures the pipes in place.
Step 5: Testing the Installation
Initial Testing: Before completely backfilling the trench, turn on the water to test the system for any leaks or pressure issues at the socket and along the pipe runs. This is easier to address before the trench is fully closed.
Adjust as Necessary: If leaks are detected, or if the water pressure is not adequate, make the necessary adjustments. This may involve tightening fittings, adding more sealant, or even replacing sections of pipe if damaged during installation.
Step 6: Finalizing the Installation
Complete Backfilling: Once you are satisfied with the test, finish backfilling the trench. Restore the landscape to its original condition as much as possible, repositioning sod or replanting any displaced flora.
Install a Protective Cover: Optionally, install a decorative cover or a simple protective cap over the socket to integrate it seamlessly into your garden’s design and protect it from debris and damage.
This detailed guide to installing a garden water socket not only ensures a functional irrigation system but also emphasizes techniques and considerations that enhance the durability and effectiveness of your installation. By following these steps carefully, you ensure a robust addition to your garden that will serve well for many years.
4.1: Overlooking Local Regulations
One of the most critical steps in installing a garden water socket, which is frequently overlooked, involves understanding and adhering to local regulations. Failure to comply with these regulations can lead to costly fines, mandatory removal of non-compliant installations, and even damage to utility services. This section delves into why it is vital to consider local codes and what specific regulations homeowners should be aware of before beginning their installation.
Importance of Local Regulations
Safety Standards: Local regulations are often in place to ensure that all construction and installation work meets safety standards that protect you and your community.
Environmental Protection: These rules can also help protect the environment, ensuring that installations do not disrupt local ecosystems or water tables.
Community Standards: Adherence to local codes helps maintain certain aesthetic or structural standards within communities, which can affect property values and community relations.
Identifying Relevant Regulations
Building Permits: Some localities require a permit for any construction that alters the physical or operational structure of a property, including the installation of irrigation systems.
Water Use and Conservation Laws: Especially in areas prone to drought, there may be regulations governing water use and the installation of irrigation equipment.
Utility Compliance: Local codes often require installations to avoid interfering with public utilities. Digging without checking for underlying utility lines is a common violation that can have severe consequences.
Steps to Ensure Compliance
Research Local Building Codes: Start by visiting your local government’s website or contacting the local building inspector’s office. They can provide you with the most current and relevant information.
Consult with Professionals: Hiring a professional, even just for a consultation, can provide valuable insights into complex regulations and help ensure that your installation meets all legal requirements.
Utility Location Services: Before any digging begins, utilize services that mark underground utilities. This service is usually free and can prevent costly and dangerous mistakes.
Handling Permits and Inspections
Securing Permits: If required, submit detailed plans of your irrigation system to the appropriate local authorities. This may include diagrams showing the location of the proposed garden water socket and the route of associated piping.
Preparing for Inspections: Some localities may require an inspection after installation to ensure that the work complies with codes. Being prepared for this by keeping detailed records and receipts of all materials used and the installation process can be helpful.
Common Pitfalls to Avoid
Ignoring Code Changes: Building and utility codes can change; what was compliant a few years ago may not be today. It’s important to verify that you have the most current information.
Assuming No Permit Needed: Never assume that a permit is not needed based on what a neighbor or friend has done. Regulations can be very specific to the type of work and even the location within the same city or county.
Final Thoughts
Understanding and complying with local regulations may not be the most exciting part of installing a garden water socket, but it is undoubtedly one of the most crucial. Taking the time to navigate these regulations not only protects you legally and financially but also ensures that your irrigation system is safe, efficient, and beneficial to both your garden and the wider community. This diligence helps maintain a harmonious balance between individual interests and community standards, fostering a responsible and sustainable approach to home improvement.
4.2: Inadequate Sealing and Support
A crucial yet often underestimated aspect of installing garden water sockets is ensuring proper sealing and structural support. These elements are vital for preventing leaks and ensuring the system remains stable and functional over time. This section addresses common mistakes related to inadequate sealing and support and provides advice on how to avoid these pitfalls effectively.
Understanding the Importance of Proper Sealing
Preventing Leaks: Proper sealing is essential to prevent water leaks at connection points, which can lead to water wastage and increased utility bills.
Ensuring Longevity: Effective sealing also protects against dirt and other contaminants that can clog or damage the irrigation system, thus extending its lifespan.
Maintaining Water Pressure: Leaks can significantly reduce water pressure, impairing the efficiency of the irrigation system and affecting plant health due to uneven watering.
Techniques for Effective Sealing
Use of Quality Sealants: Opt for high-quality, durable sealants and joint compounds that are suitable for outdoor use and compatible with the materials of your irrigation system.
Proper Application: Apply sealants evenly and according to the manufacturer's instructions. Ensure that all connections are dry and clean before applying any sealant to avoid future failures.
Regular Checks: Periodically check all sealed connections for signs of wear or leakage, especially after extreme weather conditions, which can stress the irrigation system.
Importance of Adequate Structural Support
Stability: Proper support for pipes and water sockets prevents them from shifting, which can cause stress at the joints and lead to breakages or leaks.
Protection From Damage: Adequate support protects the irrigation components from external forces, such as garden activities, animals, or adverse weather conditions.
Ease of Maintenance: A well-supported system is easier to inspect and maintain, as components are securely in place and accessible.
Supporting Your System Effectively
Secure Pipe Clamping: Use clamps and supports at regular intervals along the pipe routes, especially where pipes turn or change elevation. This prevents sagging and undue pressure on the joints.
Reinforcing Water Sockets: Ensure that the water socket is installed on a stable base, such as a concrete pad, and is properly anchored. This prevents the socket from wobbling or sinking into the soil, which can disrupt connections.
Using the Correct Fittings: Choose fittings that are designed to offer mechanical support to the connections, such as compression fittings for pipes that can withstand the changes in pressure and temperature.
Common Mistakes to Avoid
Over-Tightening Fittings: While it is important to ensure connections are tight, over-tightening can damage the threads or fittings, leading to cracks and leaks.
Neglecting Expansion and Contraction: Outdoor irrigation systems are exposed to temperature variations that cause materials to expand and contract. Ignoring this can lead to joint failures. Use flexible couplings where necessary to accommodate these changes.
Improper Installation Depths: Installing pipes too shallow can lead to damage from foot traffic or freezing conditions. Ensure pipes are buried at depths recommended by both the product specifications and local regulations.
Final Considerations
Proper sealing and support are more than just about preventing immediate problems; they are about ensuring the integrity and efficiency of your garden irrigation system for the future. By focusing on these aspects during installation, you not only enhance the functionality and reliability of your system but also contribute to its sustainability and your garden's overall health. This approach underscores a thoughtful and proactive stance towards home improvement, embodying a commitment to quality and care that goes beyond mere functionality.
5.1: Dealing with Leaks
Leakages in a garden water socket system can be one of the most common and frustrating issues for homeowners. They lead to water wastage, increased costs, and can undermine the health of the garden. This section provides practical advice on how to effectively identify and address leaks in your garden irrigation system, emphasizing strategies and tips that are often overlooked by many DIY guides.
Early Identification of Leaks
Regular Inspection: The first step in managing leaks is to conduct regular inspections of the entire irrigation system. Look for signs of moisture or pooling water in areas that should be dry, which can indicate a leak.
Listen for Sounds: Sometimes, especially for underground leaks, the sound of running water can be a clue. During quiet hours, listen carefully for any sounds of water hissing or bubbling from the irrigation lines.
Use of Water Pressure Gauges: Installing water pressure gauges at various points in your system can help you monitor the pressure. A sudden drop in pressure in a particular zone can indicate a leak.
Locating the Source of the Leak
Dry Test Method: Turn off all water sources and observe if the water meter continues to change. This can confirm a leak in the system. You can then isolate sections until you pinpoint the leak.
Dye Testing: For visible leaks or those near the surface, use a non-toxic dye in the water and watch where the dye appears on the surface. This method is particularly useful for detecting leaks in difficult areas.
Using Soil Probes: Gently probe the soil in suspect areas. Saturated soil, particularly when surrounding areas are dry, can indicate the presence of a leak.
Techniques for Repairing Leaks
For Small Leaks in Pipes:
- Use of Sealants: For minor leaks, waterproof sealants or silicone-based products can be applied. Ensure the area is dry and clean before application.
- Patch Kits: Specialized pipe patch kits are available for different types of pipe materials. Follow the manufacturer’s instructions closely to ensure a secure repair.
For Larger Pipe Breaks:
- Cut and Replace: Sometimes the best solution for a significant break is to cut out the damaged section and replace it with a new piece of pipe. Use couplings that match the pipe’s material and diameter for a secure fit.
For Leaks Around Fittings and Connectors:
- Tighten Fittings: Sometimes, simply tightening the fittings can stop a leak. Use the appropriate tools and do not overtighten, as this can damage the fittings.
- Replace Worn Gaskets or O-Rings: Over time, these can wear out and cause leaks. Replacing them can often resolve the issue.
Preventive Measures to Avoid Future Leaks
Quality Materials: Use high-quality materials for your initial installation as discussed in section 2.2. This reduces the likelihood of leaks due to material failure.
Proper Installation: Ensure that all components are installed according to manufacturer instructions and local codes. Proper installation can prevent many common issues that lead to leaks.
Winterization: If you live in an area with freezing temperatures, properly winterize your irrigation system to prevent water from freezing in the pipes and causing them to burst.
Regular Maintenance: Replace any part of your irrigation system that shows signs of wear or damage. Regular maintenance not only prevents leaks but also ensures optimal operation of the system.
Addressing leaks in your garden water socket system promptly and effectively is crucial to maintaining an efficient and sustainable irrigation system. By using these detailed strategies for identifying, locating, and repairing leaks, you can protect your investment in your garden’s irrigation infrastructure and ensure that it continues to function at its best.
5.2: Managing Low Water Pressure
Low water pressure in a garden irrigation system can significantly impact its efficiency and the health of your garden. It can lead to inadequate watering, which stunts plant growth and reduces the effectiveness of your irrigation investment. This section explores unique insights and solutions for troubleshooting and resolving low water pressure issues in garden water sockets, often overlooked in general maintenance discussions.
Understanding Causes of Low Water Pressure
Main Water Supply Issues: Sometimes, the problem originates from the municipal water supply or your well system. Check if the issue is isolated to your irrigation system or affects the entire house.
Blocked Filters and Pipes: Sediment and debris can accumulate in filters and pipes, restricting flow. Regularly cleaning filters and inspecting pipes for blockages can prevent this common issue.
Inadequately Sized Piping: Using pipes that are too narrow for the volume of water your garden requires can lead to low pressure. Ensure that the diameter of your irrigation pipes matches the flow rate needed by your plants.
Leaks in the System: As addressed in section 5.1, leaks can divert water away from where it's needed, causing a drop in pressure in parts of your garden.
Solutions for Improving Water Pressure
Install a Pressure Regulator: If your water pressure is too high at the source, it can cause damage or leaks. Conversely, if it's too low, a pressure regulator with a pump can boost the pressure specifically for your irrigation system.
Upgrade Your Piping: Consider replacing sections of your piping with larger diameter pipes where feasible. Larger pipes can carry more water, reducing the chances of pressure drops over long distances.
Optimize Irrigation Design: Redesign your irrigation layout to reduce the number of turns and junctions, which can decrease water pressure. Consider creating separate zones that can be watered independently, minimizing the demand on any single part of the system at a time.
Regular Maintenance Checks: Incorporate a routine for checking and cleaning all parts of your irrigation system. This includes inspecting sprinkler heads, valves, and filters for clogs and wear.
Innovative Techniques to Manage Pressure Variations
Variable Speed Pump Controllers: These devices can adjust the pump's speed based on the water demand, providing more consistent pressure throughout the irrigation system.
Pressure-Sensitive Drip Lines: These drip lines adjust their output based on the water pressure within the system, ensuring that plants receive consistent moisture levels even with fluctuations in pressure.
Use of Accumulator Tanks: Installing an accumulator tank can help regulate and even out the pressure within your irrigation system, providing a more steady flow rate that is less susceptible to dramatic drops.
Monitoring and Adjusting the System
Install Pressure Gauges: Place pressure gauges at different segments of your irrigation system to monitor the pressure levels actively. This can help you identify where pressure drops occur and determine the effectiveness of your pressure management strategies.
Periodic Reevaluation: As your garden grows and changes, so too will its water needs. Regularly assess your garden's irrigation requirements and adjust your system accordingly to maintain optimal water pressure.
Professional Consultation: If low water pressure continues to be an issue despite troubleshooting, consider consulting with a professional. They can offer more specialized insights and solutions tailored to your specific situation.
Managing low water pressure effectively requires a proactive approach to system design and maintenance. By understanding the underlying causes and implementing strategic solutions, you can ensure that your garden receives the right amount of water at the right pressure, enhancing the health of your plants and the overall vitality of your garden.
Conclusion: Maximizing the Benefits of Your Garden Water Socket
Installing a garden water socket is a significant step towards creating an efficient and sustainable garden irrigation system. This concluding section summarizes the key insights discussed throughout the article and emphasizes the importance of continuous engagement and improvement to maximize the benefits of your garden water system. Additionally, it underscores the potential integration of advanced technologies for enhanced management and efficiency.
Summary of Key Points
Strategic Placement: The choice of location for your garden water socket can dramatically affect the efficiency of water use and the health of your garden. As discussed in sections 1.1 and 1.2, understanding the microclimate, soil composition, and water requirements of your garden is crucial.
Quality of Installation: Using the right tools and materials, as outlined in sections 2.1 and 2.2, not only ensures that the installation process is smooth but also impacts the longevity and reliability of the irrigation system. Proper installation techniques are critical to avoid common pitfalls such as leaks and pressure issues.
Maintenance and Troubleshooting: Regular maintenance, as highlighted in sections 5.1 and 5.2, is essential for the system's longevity. Promptly addressing issues like leaks and managing water pressure will keep the system running efficiently and prevent water wastage.
The Role of Continuous Engagement
Routine Inspections: Regular checks of the irrigation system ensure that any issues can be identified and rectified early, which helps maintain optimal function and efficiency.
System Adjustments and Upgrades: As your garden evolves, so too should your irrigation system. Reassessing the layout, upgrading components, and recalibrating the system to meet changing needs are crucial for maintaining efficiency.
Leveraging Technology for Improved Management
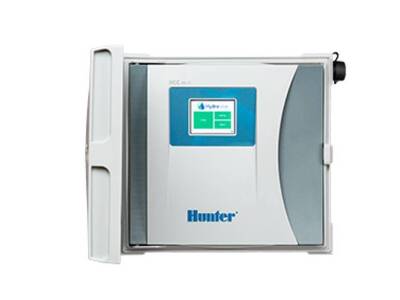
Smart Irrigation Controllers: Integrating WiFi-connected controllers can revolutionize how you manage your garden's irrigation. These devices allow for remote monitoring and control, enabling adjustments based on weather forecasts and real-time soil moisture levels, even when you are away.
Sensors and Automation: Employing sensors that detect moisture levels in the soil can help automate watering schedules, ensuring that plants receive the precise amount of water needed for optimal growth.
Data-Driven Decisions: Utilizing the data collected from smart devices can help you make informed decisions about water usage, system performance, and the overall health of your garden.
Final Thoughts
The installation of a garden water socket, while technical and occasionally challenging, offers a significant opportunity to enhance the efficiency and effectiveness of garden care. The principles and practices discussed here are designed to not only facilitate a successful installation but also to inspire a proactive approach to garden management. By embracing technology and remaining vigilant about maintenance and improvements, you can ensure that your garden remains a thriving and sustainable space.
This comprehensive approach to understanding, installing, and maintaining a garden water socket will help you achieve a garden that not only looks great but is also resource-efficient and environmentally friendly. The journey to a well-irrigated garden is ongoing and requires dedication, but the rewards—lush vegetation and a beautiful, resilient landscape—are well worth the effort.
 Free Online Irrigation-Planner


